
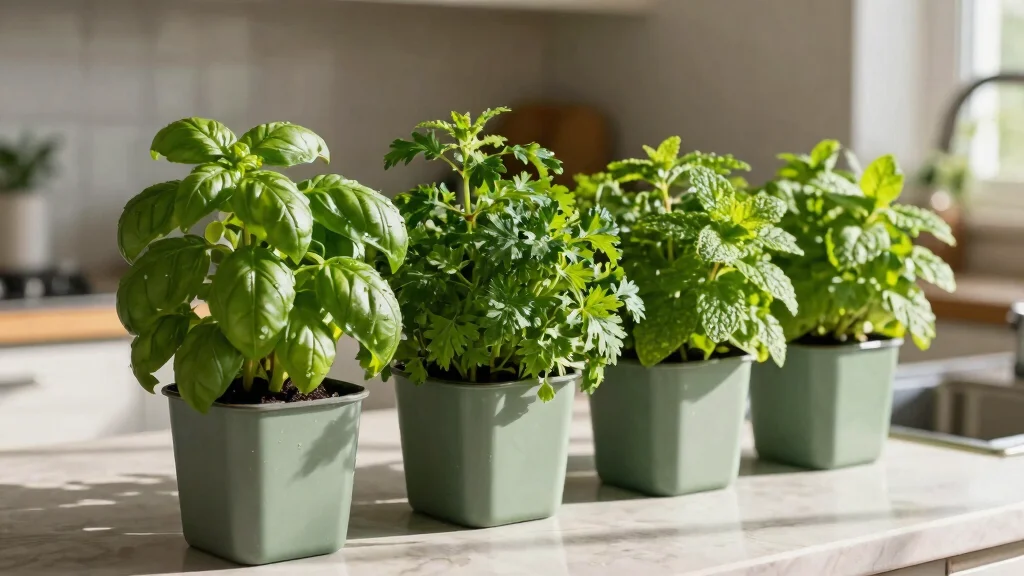
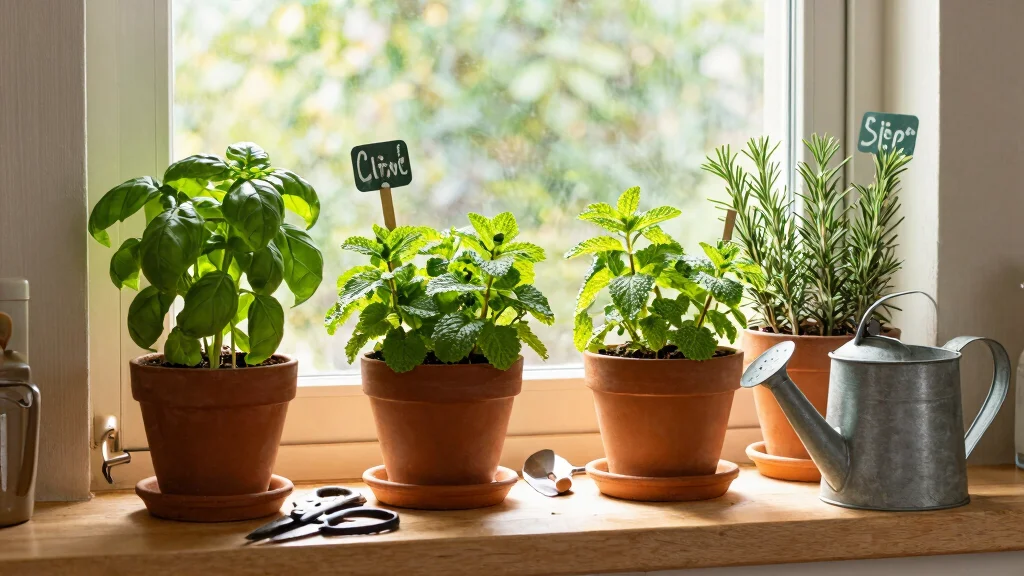
As the gardening season wraps up, you might find yourself looking for ways to enjoy the fruits of your labor long after the blooms have faded. There’s something rewarding about preserving your garden’s bounty, especially when it comes to herbs. This post is all about sharing creative ways to dry your herbs while adding a touch of charm to your home. Whether you’re an experienced gardener or just starting out, finding the right herb drying rack can transform your dried goods into beautiful decorations as well as practical pantry staples.
If you love gardening and want to make the most out of your herb harvest, this guide is perfect for you. You’ll discover stylish and functional DIY herb drying rack ideas that fit snugly in small spaces while also keeping your herbs fresh and ready to use. Say goodbye to wilted herbs and hello to delightful displays that not only serve a purpose but also brighten your kitchen or garden area.
In this blog post, I’ve gathered eight unique herb drying rack ideas that are not only practical but also aesthetically pleasing. You’ll find designs that cater to various tastes and decor styles. Whether you prefer something rustic or a bit more industrial, there’s an idea here for everyone. Get ready to elevate your drying game and learn how to preserve your herbs beautifully!
Key Takeaways
– Discover eight creative designs for herb drying racks that fit perfectly in small spaces, making preservation both practical and attractive.
– Explore various herb drying techniques to ensure your herbs maintain their flavor and aroma, enhancing your culinary endeavors.
– Learn about the best herbs for drying, helping you choose which plants to grow for optimal preservation.
– Find tips on making your own DIY herb drying rack, allowing you to customize your herb storage to match your personal style.
– Gain insights into how dried herbs can add flair to your cooking and serve as stunning decor in your home, connecting your gardening passion to daily life.
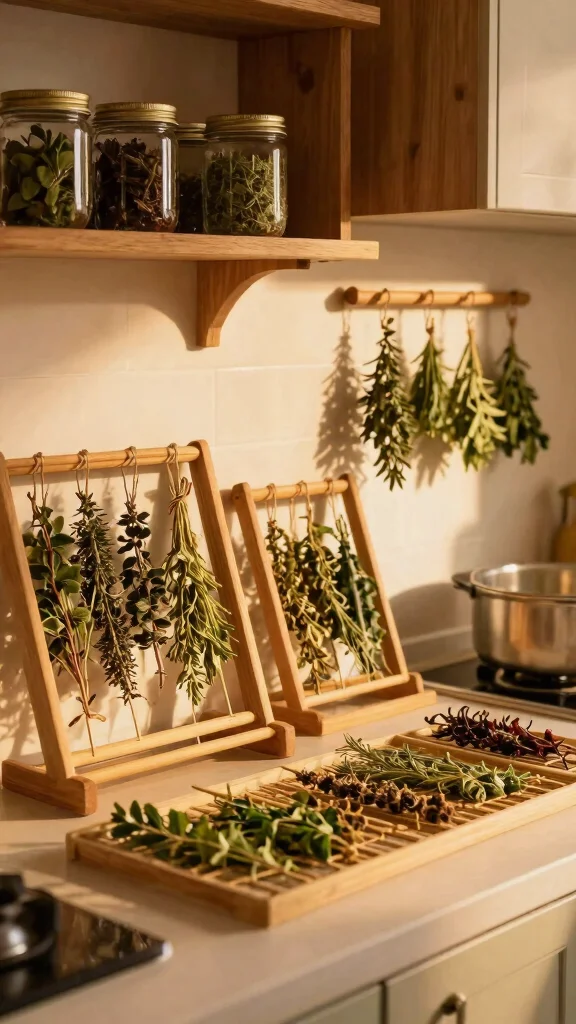
1. Vertical Wall-Mounted Drying Rack
Are you looking to maximize your kitchen space while enjoying fresh herbs? A vertical wall-mounted drying rack is a fantastic solution. It allows you to elegantly hang multiple bunches of herbs without cluttering your counters, making it both functional and stylish.
Using reclaimed wood and durable hooks, you can create a unique piece that not only looks good but also promotes air circulation for effective drying. Arrange your herbs thoughtfully to ensure they’re easy to access and dry evenly.
Tips:
– Vary the heights of your herb bunches for visual interest.
– Coordinate colors for an added aesthetic flair.
– Incorporate small jars below to store your dried herbs.
This design is not just a drying solution; it’s a beautiful decor element!
Small kitchen, big flavor—a vertical herb drying rack turns wall space into a pantry of scent. Hang thyme, rosemary, and mint with easy hooks, then grab what you need as it dries. Quick setup, lasting harvest, and zero counter clutter.
Vertical Wall-Mounted Drying Rack
Editor’s Choice


Herb Drying Rack-2ft Diameter 8 Layer Folding Mesh Hanging Basket Dryer …
2. Multifunctional Ladder Rack
Do you have an old wooden ladder lying around? Turn it into a multifunctional herb drying rack! This creative idea combines practicality with a charming vintage vibe, allowing you to hang herbs while showcasing your potted plants.
Perfect for small spaces, this ladder design adds depth without taking up much floor area, and it’s easy to relocate when needed. You can even paint it to match your kitchen decor, giving it a personal touch.
Insights:
– Select a natural finish for a rustic look.
– Ensure herbs are spaced for even drying.
– Customize the color for extra flair.
Your multifunctional ladder rack will not only serve as a drying station but also as a stunning display piece!
Did you know a repurposed ladder can become a multifunctional herb drying rack and save up to 40% of floor space? This vintage-inspired setup lets you hang herbs while displaying potted plants, perfect for small kitchens.
Key Trade-offs & Our Top Pick
When it comes to choosing the ideal herb drying rack, you have several creative options to consider. Each design has its unique advantages and potential downsides. Let’s break down the most popular choices to help you make an informed decision.
1. Vertical Wall-Mounted Drying Rack
– Pros:
– Space-saving design is perfect for small areas.
– Easy access to herbs while they dry.
– Cons:
– Installation may require tools and hardware.
– Limited capacity for larger harvests.
– Best for: Those who want a stylish and functional way to dry herbs in tight spaces.
2. Multifunctional Ladder Rack
– Pros:
– Combines drying and storage; use it for herbs and other plants.
– Versatile; can be moved around easily.
– Cons:
– Takes up floor space; may not fit in all areas.
– Can be costly if made from high-quality materials.
– Best for: Gardeners who need a multipurpose solution and have enough space.
3. Hanging Mason Jar Display
– Pros:
– Adds a decorative touch to your kitchen or garden.
– Jars protect herbs from dust and pests.
– Cons:
– Limited airflow can slow down the drying process.
– Requires more maintenance to check individual jars.
– Best for: Those looking to marry functionality with aesthetics in their herb drying efforts.
4. Rustic Clothespin Line
– Pros:
– Inexpensive and easy to set up; no special tools required.
– Provides a charming, rustic look.
– Cons:
– Not ideal for high humidity environments; herbs may mold.
– Limited space for large batches.
– Best for: Budget-conscious gardeners who enjoy a DIY approach and have smaller harvests.
5. Industrial Pipe Herb Drying Rack
– Pros:
– Sturdy and durable; can hold a lot of herbs.
– Unique industrial design adds character to your space.
– Cons:
– May require welding or assembly, which can be challenging.
– Heavier and less portable than other options.
– Best for: Those who appreciate a strong, lasting rack that can handle larger quantities.
Expert Recommendation:
Best Overall: Vertical Wall-Mounted Drying Rack
This option stands out for its combination of space efficiency, easy access, and aesthetic appeal. You get excellent value for your money, especially if you have limited space. It’s easy to use and offers long-term durability, making it ideal for most gardeners looking to preserve their herb harvest beautifully.
Why We Picked This:
While the vertical wall-mounted drying rack is a fantastic option for most, some may prefer other designs based on specific needs. If you have a larger harvest, the multifunctional ladder rack may suit you better. For a budget-friendly choice, the rustic clothespin line is a great way to go. Consider your space, budget, and the volume of herbs you want to dry before making a decision. Each option has its benefits, so choose what works best for your gardening style!
Multifunctional Ladder Rack
Editor’s Choice
MEKOLIFE Herb Drying Rack with Mesh Design, Hanging Drying Rack with Gre…

Quarut 3 Pack 10 inch Plant Pots,Whiskey Barrel Planters with Drainage H…

PerkHomy Natural Jute Twine 600 Feet Long Twine String for Crafts Gift W…
3. Hanging Mason Jar Display

Looking for a stylish way to dry your herbs? Transforming mason jars into a hanging herb drying rack is a brilliant idea! You can either attach them to a wooden board or hang them directly from the ceiling, creating a unique display that enhances your kitchen’s charm.
The glass jars provide a modern touch while maintaining a rustic appeal, making it easy to see your herbs at a glance.
Best Herbs for Drying:
– Oregano
– Mint
– Sage
This design not only keeps your herbs organized but also adds a decorative element to your cooking space!
Hanging Mason Jar Display
Editor’s Choice
PerkHomy Natural Jute Twine 600 Feet Long Twine String for Crafts Gift W…

Paksh Novelty Wide Mouth Mason Jars With Lids 32 oz – Glass Quart Maso…

BAYKA Wall Shelves for Bedroom Decor, Floating Shelves for Wall, Display…
4. Rustic Clothespin Line
Are you a fan of DIY projects? A rustic clothespin line for drying herbs is simple yet delightful! With just some twine or wire and a few clothespins, you can create a charming herb drying station that resembles a laundry line.
Stretch this line across a window or wall to maximize exposure to light and air, essential for effective drying. It’s a fun way to incorporate your herbs into your kitchen decor.
Quick Tip:
– Hang your herbs in a sunny spot for optimal drying conditions.
– Use varying lengths of herbs for added interest.
This design is both functional and playful, adding a unique touch to your kitchen!
For tiny kitchens, a rustic clothespin line is your best friend—simple, chic, and incredibly practical as a herb drying rack. Clip herbs as you harvest, hang them in a sunny spot, and watch the flavors stay bold without clutter.
You might also like
Rustic Clothespin Line
Editor’s Choice

Cotton Twine Pink and White Baker String 2mm Thick 328 Feet Christmas Tw…

Cute Bee Food Bag Clips Sealing Clamps for Bread, Chips, Snacks & Potato…

Herbishh Black Shampoo, Hair Dye Shampoo 3 in 1, 100% Grey Coverage, Dem…
5. Industrial Pipe Herb Drying Rack
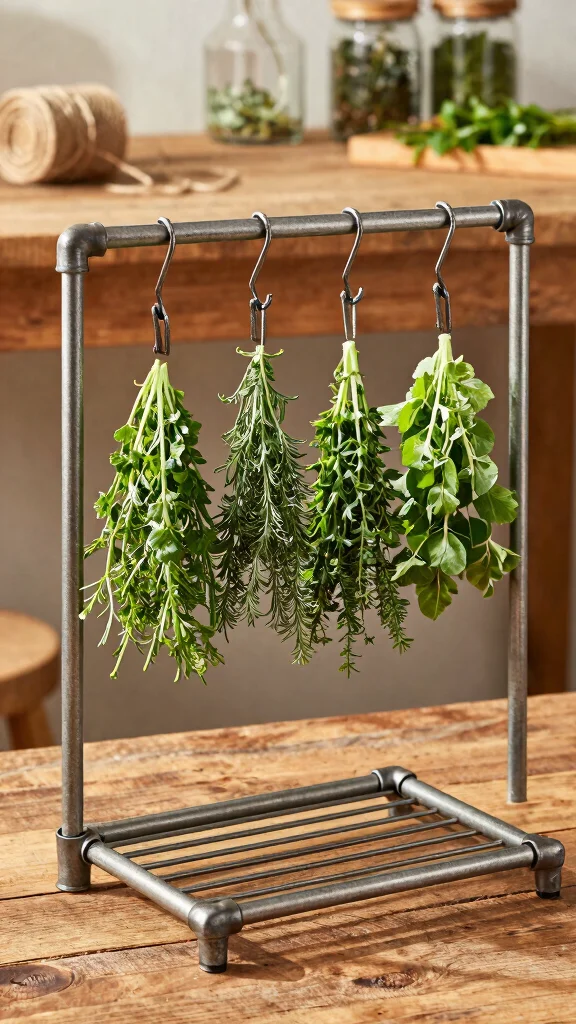
Are you drawn to industrial design? Consider crafting a herb drying rack using metal pipes for a modern, edgy touch. This sturdy construction allows you to hang your herbs on S-hooks or clamps, making adjustments a breeze.
The combination of rustic metal and vibrant green herbs creates a stunning visual contrast that will impress anyone who sees it.
Design Tips:
– Choose a black or galvanized finish for authenticity.
– Pair with wood elements for a balanced look.
This rack is not only striking but also incredibly durable, perfect for preserving your garden’s bounty.
📹 Related Video: DIY INDUSTRIAL PIPE SHELF
Industrial Pipe Herb Drying Rack
Editor’s Choice

3.2 Inch Heavy Duty S Hooks (2-Pack), 550LB Capacity 304 Stainless Steel…

4-Layer Herb Drying Rack – Collapsible Mesh Hanging Dryer Net for Herbs,…
6. Vintage Frame Herb Display
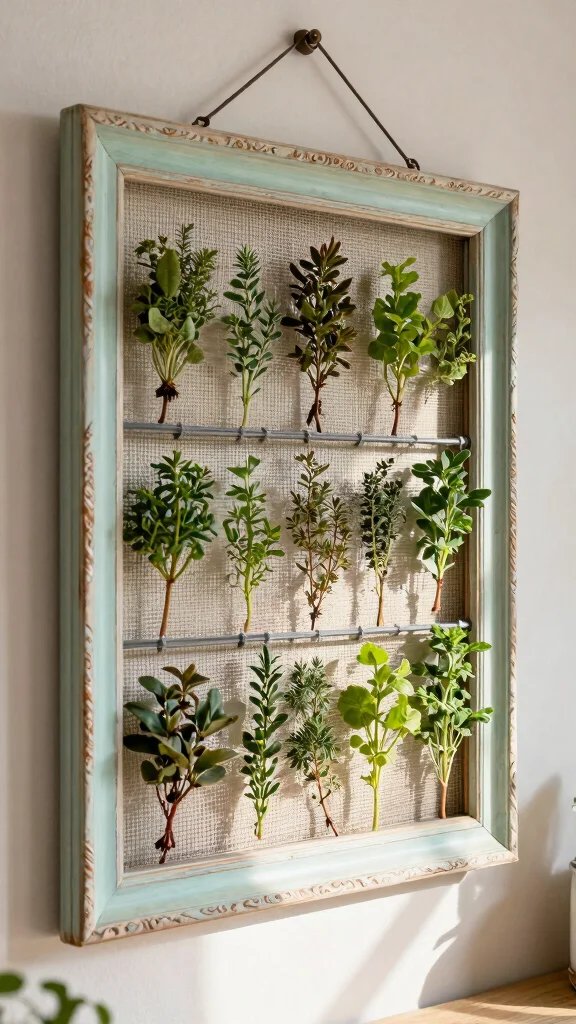
Do you love vintage decor? Repurposing old picture frames into herb drying racks is a stylish and sustainable option! By removing the glass and adding mesh or chicken wire, you create an airy drying space that looks great while serving a purpose.
This unique piece can be hung on the wall or placed on a counter, allowing your herbs to dry elegantly while adding character to your kitchen.
Crafting Tips:
– Opt for ornate frames for extra visual appeal.
– Stain or paint the frame to match your decor.
This option not only preserves your herbs but turns them into beautiful displays!
Vintage Frame Herb Display
Editor’s Choice

4×6 Gold Picture Frame Decor Ornate Pink Floral Metal Photo Frames with …

Simple Organizing: 50 Ways to Clear the Clutter (Inspired Ideas)

Tnstbiee Rustic Adjustable Hanging Herb Drying Rack-Holds 10 Bouquets, S…
7. Tiered Stand for Herb Drying
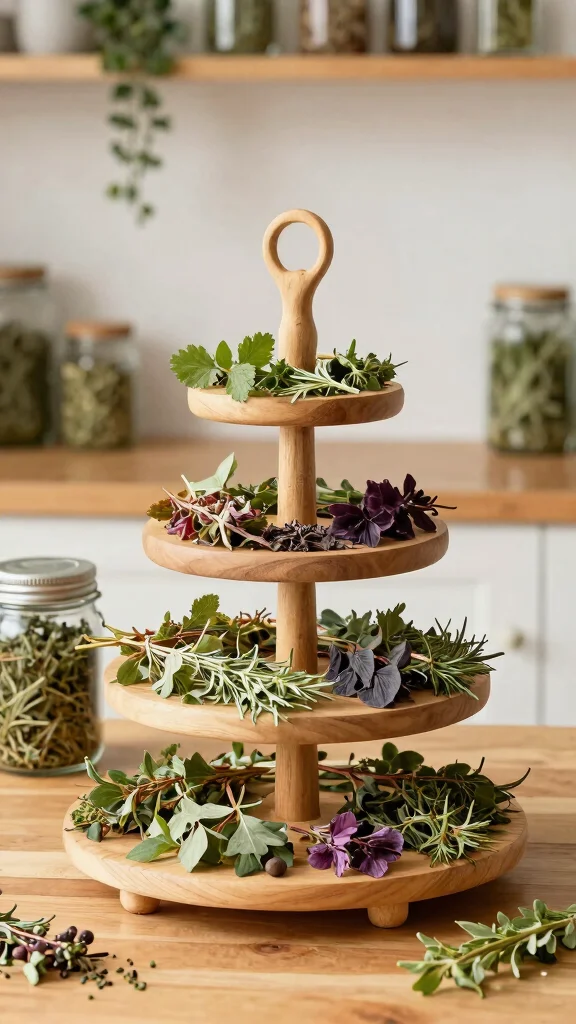
Are you short on space but want to dry multiple herbs? A tiered stand is a perfect solution! This design allows for even spacing of herbs, promoting optimal airflow while drying.
You can easily build one from wooden pallets or find a pre-made option that fits your needs.
Use the following tips:
– Ensure slats are present for air circulation.
– Mix different herb varieties on each tier for a colorful display.
This tiered stand not only assists with drying but also enhances your kitchen’s aesthetic!
You Might Also Like

Tiered Stand for Herb Drying
Editor’s Choice

4 Layer Herb Drying Rack, Hanging Mesh Net, Foldable Plant Drying Rack W…

DIY Wood Pallet Projects: 30 Genius Ways To Recycle Wooden Pallets
4 Layer Herb Drying Rack, Hanging Mesh Net, Foldable Plant Drying Rack W…
8. Hanging Garden Herb Drying Rack
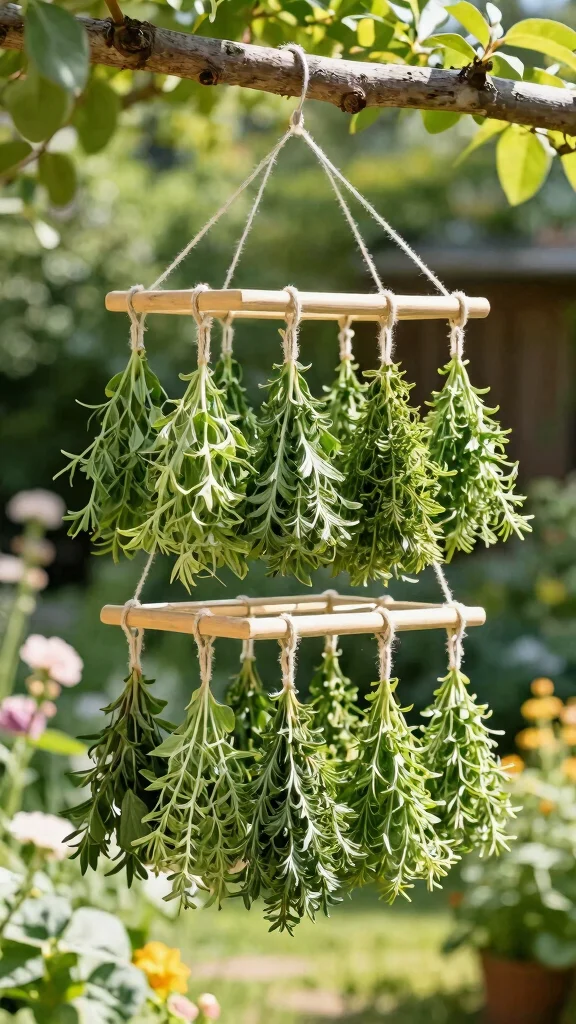
Do you want to blend gardening with herb drying? A hanging garden herb drying rack is an innovative approach! Use sturdy twine to hang bunches of herbs from hooks or branches, allowing nature to assist in the drying process.
The outdoor environment provides excellent air circulation, and the greenery enhances the overall aesthetic of your garden space.
Garden Care Tips:
– Keep the area sheltered from rain to protect your herbs.
– Position the rack where it gets plenty of sunlight for the best results.
This design seamlessly combines your passion for gardening with the practical aspect of drying your herbs!
Hanging Garden Herb Drying Rack
Editor’s Choice
MEKOLIFE Herb Drying Rack with Mesh Design, Hanging Drying Rack with Gre…

XKDOUS 476ft Butchers Cooking Twine, 100% Cotton Kitchen Twine String, 2…
4-Layer Herb Drying Rack – Collapsible Mesh Hanging Dryer Net for Herbs,…
Conclusion
With these eight creative herb drying rack ideas, preserving your garden harvest can be an enjoyable and visually appealing process. Each design not only serves its functional purpose but also enhances the beauty of your space.
So, why not turn your kitchen or garden into a stunning display of your beloved herbs? Take on a DIY project that reflects your style while providing the perfect solution for herb preservation!
Note: We aim to provide accurate product links, but some may occasionally expire or become unavailable. If this happens, please search directly on Amazon for the product or a suitable alternative.
This post contains Amazon affiliate links, meaning we may earn a small commission if you purchase through our links, at no extra cost to you.
Frequently Asked Questions
How do I pick the right herb drying rack design for a small space?
Start by measuring your space and choosing a design that uses vertical or wall-mounted real estate. For tiny kitchens or balconies, a DIY herb drying rack made from affordable materials can be space-saving and pretty. Options include a simple backboard with evenly spaced dowels, a hanging frame from a ceiling hook, or a stackable rack from an old organizer. Look for modular designs you can expand as your garden harvest grows. Prioritize good airflow and indirect light to keep your herb drying rack effective. Align the design with your garden harvest preservation goals and herb drying techniques for practical results that also look nice.
What are the essential herb drying techniques I should know before building a rack?
A few solid techniques pair perfectly with a herb drying rack. Hang or bundle herbs in small bunches in a warm, dry spot away from direct sun to encourage even drying. Use a simple screen or mesh tray on your rack to improve airflow for leafy herbs. Check dryness with a crumble test—when leaves crumble between your fingers, they’re ready. Keep humidity steady, turn the racks daily to prevent mold, and finish by storing in airtight containers to protect aroma. These herb drying techniques make preserving herbs straightforward and satisfying.
Which herbs dry best and how should I arrange them on a drying rack?
Some best herbs for drying are thyme, oregano, rosemary, sage, marjoram, dill, and chives. Basil and certain leafy herbs can dry, but they often lose flavor faster, so consider drying them quickly or using a quick-freeze method. On your rack, group herbs by moisture and leaf size: place hardy woody stems (rosemary, thyme) lower and spread leaves in a single layer to avoid clumping. Don’t overcrowd the shelves—air needs to circulate. Label batches so you know which garden harvest preservation method you used for each herb, and enjoy fragrant, ready-to-store bundles later on.
How can I DIY a budget-friendly herb drying rack using upcycled materials?
You can build a charming, inexpensive DIY herb drying rack with upcycled bits. Try a frame made from wooden dowels and scrap boards, add a few inexpensive mesh panels for airflow, or repurpose a metal clothes rack or an old wine rack. For a compact option, use tension rods and netting to create small, adjustable shelves. Sand, seal, and label to keep things food-safe and attractive. This approach fits neatly into garden harvest preservation goals while keeping costs low and creativity high.
How long does drying take and how do I know when herbs are ready for storage?
Drying times vary with humidity and leaf thickness, but most herbs are ready in about 1 to 4 days on a well-ventilated herb drying rack. Leaves should crumble easily and stems should snap rather than bend. If your space is humid, expect longer drying times and consider rotating or moving racks to a drier spot. Once dry, strip leaves from the stems, or crumble gently, then store in airtight jars away from light to maximize flavor for preserving herbs.
Related Topics
herb drying rack
DIY herb drying
small space solutions
preserving herbs
herb drying techniques
creative designs
beginner friendly
garden preservation
aesthetic gardening
functional decor
best herbs to dry
vintage herb rack