
Creating a berry garden filled with luscious raspberries can feel like an overwhelming task, but it doesn’t have to be! I made this post because I believe everyone should enjoy the sweet satisfaction of growing their own berries. Whether you’re a seasoned gardener or just starting out, understanding how to build the perfect raspberry trellis can transform your gardening experience.
If you’re into gardening, especially vertical gardening techniques, this post is just for you! You’ll find practical ideas that not only maximize your growing space but also enhance the beauty of your garden. I pulled together 10 raspberry trellis DIY ideas that are creative, easy to build, and perfect for anyone looking to cultivate a productive berry garden. Get ready to roll up your sleeves and dive into some fun DIY garden projects!
With these tips, you’ll be on your way to a flourishing vertical berry garden in no time. From classic wooden structures to minimalist designs, there’s something for everyone. Not only will you get inspired, but you’ll also learn key trellis construction techniques that will support your raspberries and keep them healthy. So, let’s dig in and discover the best ways to elevate your gardening game!
Key Takeaways
– Discover 10 creative raspberry trellis DIY ideas that fit various aesthetics and spaces.
– Learn vertical gardening ideas that maximize growing areas while keeping your plants healthy and accessible.
– Find practical trellis construction techniques to support your raspberry plants for optimal growth.
– Get inspired with DIY garden projects that can enhance your yard’s beauty while providing delicious berries.
– Gain valuable raspberry growing tips to ensure your plants thrive, making your gardening experience rewarding and fun.
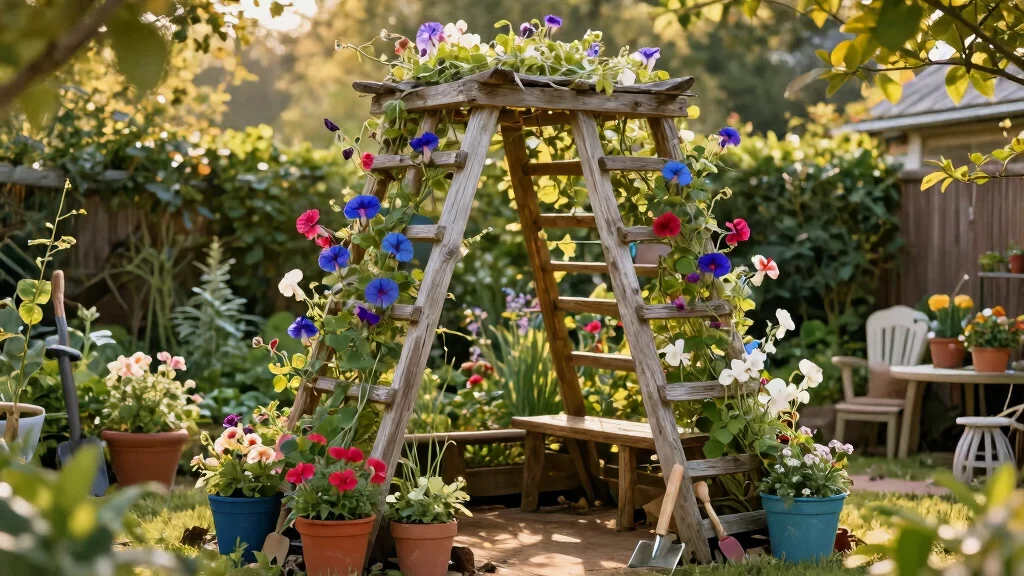
1. Classic Wooden A-Frame Trellis

Are you dreaming of a sturdy yet stylish way to support your raspberry plants? The classic wooden A-frame trellis is not only functional but also enhances the beauty of your garden. With its triangular shape, this trellis allows optimal sunlight and airflow, promoting healthy growth for your berries.
Building your own A-frame trellis is straightforward. You’ll need a few pieces of wood (like 2x4s), screws, and a saw. Cut the wood to about 5-6 feet high and create two triangular frames that meet at the top. Secure it against a wall or in the ground, and gently guide your raspberry canes to climb around the frame as they grow. A splash of weather-resistant paint can add color while protecting the wood.
Key Tips:
– Anchor your trellis securely to withstand wind and heavy foliage.
– Choose rot-resistant wood to ensure longevity.
– Plant flowers at the base for extra charm!
This design is practical and makes harvesting easier.
📹 Related Video: Building a Simple and Inexpensive A-Frame Trellis
Classic Wooden A-Frame Trellis
Editor’s Choice

Mr. Pen- Wood Screws Assortment Kit, 152 pcs, Silver, Phillips Flat Head…

Wire Trellis for Climbing Plants Outdoor, 20-Set Wall Wire Trellis Kit w…

RUITOOL Japanese Hand Saw 6 Inch Double Edge Sided Pull Saw Ryoba SK5 Fl…
2. Rustic Horizontal Trellis

Looking for a distinctive way to showcase your raspberry plants? A rustic horizontal trellis adds character and charm to your garden while providing essential support. Made from reclaimed wood or bamboo, this design utilizes horizontal space effectively, perfect for smaller gardens.
To create your horizontal trellis, start with two tall stakes and attach horizontal slats or wires at varying heights between them. This setup encourages your raspberry canes to spread out while maintaining an organized appearance. It’s a sustainable choice that fits beautifully with nature.
Design Tips:
– Use natural materials that complement your garden’s style.
– Stain or paint the wood to enhance its look.
– Add climbing plants alongside your raspberries for an even more attractive display!
This trellis not only looks appealing but also optimizes your garden layout.
Rustic Horizontal Trellis
Editor’s Choice

Vivifying Garden Twine, 656 Feet 2mm Green Plant Ties, Strong Jute Twine…

Cambaverd Bamboo Stakes 4ft Natural Plant Stakes for Tomatoes, Beans, Cl…
LZRS 2 Pack 71x20in Rustic Iron Arch Decoration Garden Trellis with Blac…
3. Wire and Post Trellis

Seeking a budget-friendly trellis option? The wire and post trellis is a simple yet effective solution. This design features sturdy posts with wire strung between them, allowing your raspberries to climb freely while maintaining a clean appearance.
To set it up, install tall posts spaced 6-8 feet apart and run horizontal wire securely at different heights. This flexible framework encourages your raspberry plants to grow upward. Use gardening clips to guide their canes as needed.
Growing Tips:
– Opt for rust-resistant wire for durability.
– Regularly check for loose wires to keep everything secure.
– Gently tie canes as they grow to promote vertical growth.
This design combines simplicity with practicality, ensuring your raspberry plants flourish.
Fun fact: A raspberry trellis diy setup with tall posts spaced 6-8 feet apart and horizontal wires at multiple heights keeps canes tidy and boosts airflow. This simple framework can lead to healthier plants and bigger yields.
Wire and Post Trellis
Editor’s Choice

50FT Garden Wire Heavy Duty Green Coated Plant Twist Tie Garden Training…

CIQIYO® 100 Pcs Plant Support Clips,Plastic Clips for Securing Plants,T…

Wire Trellis for Climbing Plants Outdoor, 20-Set Wall Wire Trellis Kit w…
4. Vertical Pallet Trellis
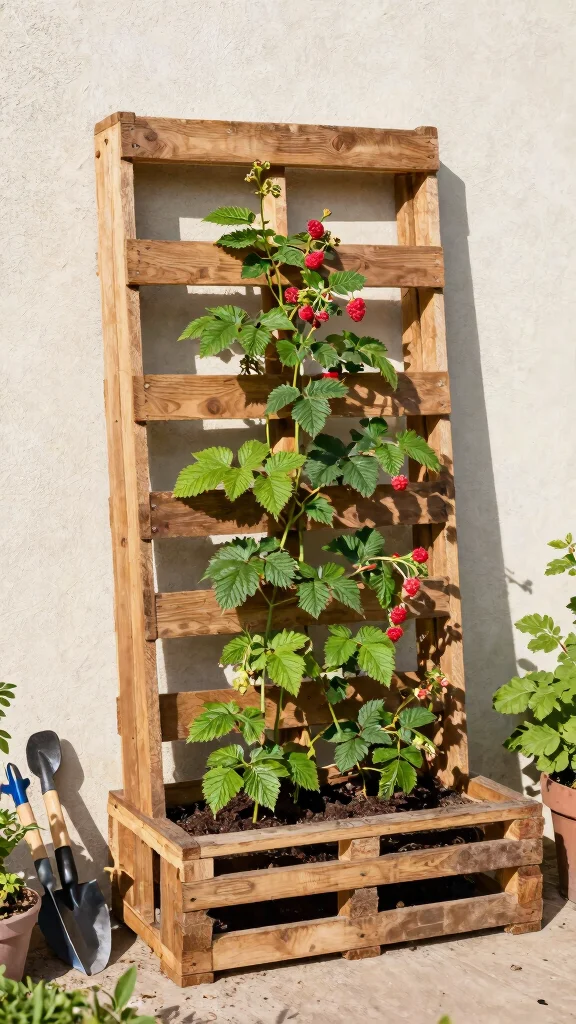
Do you enjoy DIY projects that are eco-friendly? A vertical pallet trellis is a creative way to repurpose wooden pallets while providing support for your raspberry plants. This design can transform an ordinary wall or fence into a unique climbing surface.
To build your vertical pallet trellis, find a good-quality wooden pallet and secure it upright against a wall or fence. You can fill the bottom with soil to plant directly into the pallet or use pots for easy maintenance. As your plants grow, they’ll weave through the slats, creating a stunning display.
Practical Tips:
– Treat the pallet with non-toxic wood preservatives for safety.
– Twine jute or garden cord through the pallet for extra support.
– Paint the pallet to add a splash of color to your garden.
This vertical trellis not only supports your plants but also serves as a charming garden feature.
Vertical Pallet Trellis
Editor’s Choice
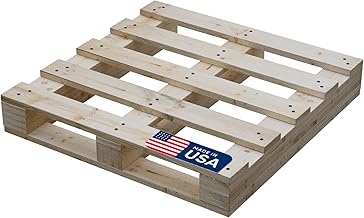
Treaton, Heavy-Duty 2-Way Entry Wooden Pallet – 31x24x5”, Industrial…

Quarut 4 Pack 8 Inch Flower Pots Planters for Outdoor Indoor, Plastic Pl…

Miracle-Gro Organic Outdoor Potting Mix – Plant Soil for Outdoor Contain…
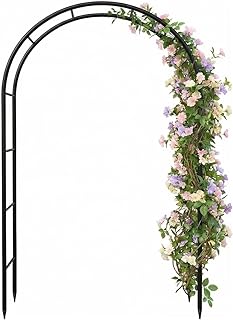
5. Archway Trellis
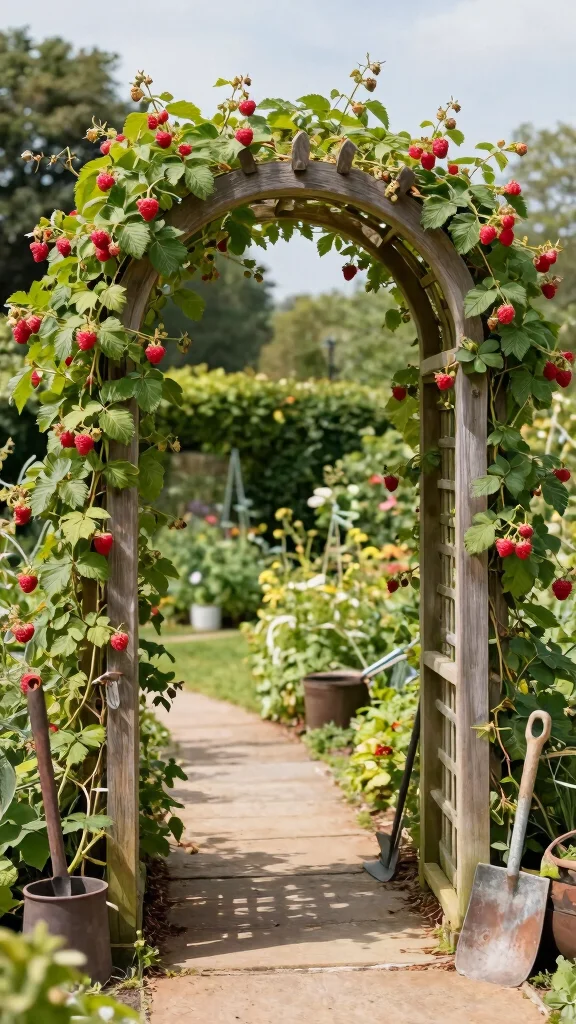
Want to add a touch of elegance to your garden? An archway trellis not only supports your raspberry plants but also serves as a beautiful entrance. You can create it using wood or metal, and once draped with vines, it becomes a stunning focal point.
To build an archway trellis, you’ll need two upright posts and a curved top piece. Aim for a height of 6-8 feet, depending on your preference. Train your raspberry canes to climb over the arch, creating a lovely canopy as they grow.
Design Considerations:
– Choose weather-resistant materials for durability.
– Decorate with climbing flowers or lights for added charm.
– Pair the archway with a pathway for an enchanting garden experience!
This trellis is both functional and transforms your garden into a picturesque escape.
You might also like
Archway Trellis
Editor’s Choice

VINGLI 85in Wooden Arbor, Wedding Arch for Ceremony, Wood Trellis for Pl…
Galvanized Metal Garden Arbor,7.6ft H x 4.6ft W,Rust-Resistant Heavy-Dut…
6. DIY Wire Mesh Panel Trellis

For a modern and sleek trellis, consider a DIY wire mesh panel design. It’s not only easy to install but also effectively supports your plants. These panels come in various styles, making them adaptable to any garden.
To set up, secure the mesh to a sturdy frame or wall. Ensure the mesh is tight enough to support mature raspberry canes. As your plants grow, they’ll weave through the mesh, allowing sunlight to reach every part.
Benefits:
– Wire mesh panels are durable and withstand the elements.
– They offer a clean, contemporary look for modern gardens.
– The open design allows excellent air circulation, reducing disease risks.
This solution is perfect for gardeners seeking functionality with a minimalist approach.
DIY tip: raspberry trellis diy shouldn’t be complicated—secure a sturdy frame, staple in tight wire mesh, and watch your canes weave their own support. It’s a sleek, sun-loving setup that makes pruning and harvest a breeze.
DIY Wire Mesh Panel Trellis
Editor’s Choice

Green Zip Ties Assorted Sizes (4″+6″+8″+12″), 400 Pack, Cable Ties UV Re…

Thealyn 12 Pack 16 Inch Plant Support Stakes, Metal Single stemmed Flowe…

24 Pics DIY Metal Plant Protectors from Deer, Garden Fencing Animal Barr…
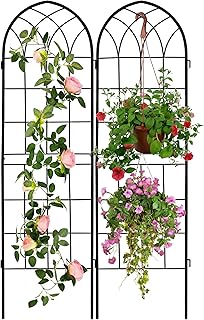
7. Decorative Garden Trellis

Are you looking for a trellis that’s as beautiful as it is functional? A decorative garden trellis serves as an artistic focal point while providing support for your raspberry plants. These trellises come in various designs, from ornate wrought iron to finely crafted wood.
To incorporate a decorative trellis, choose a style that complements your garden theme. Plant your raspberries at the base and guide their canes upward as they grow. This trellis enhances the visual appeal of your garden while supporting your plants.
Stylish Tips:
– Add climbing flowers that bloom alongside your raspberries for vibrant color.
– Use containers at the base for a layered look with different plant heights.
– Regularly check your plants to ensure they climb correctly and support them as needed.
A decorative trellis can transform your berry garden into a work of art.
Difficulty Rating & Requirements
Overall Difficulty Rating: Medium
Building a raspberry trellis DIY project can be a fun and rewarding challenge. It’s rated as medium because it requires some basic woodworking skills, as well as the ability to measure and cut materials. This makes it ideal for hobbyist gardeners and DIY enthusiasts who have a little experience but are not yet experts. If you’re comfortable with hand tools and following instructions, you’ll find these projects manageable and satisfying.
Time Estimate:
⏱ Estimated time: 4-6 hours per trellis design.
– Planning and Design: 1-2 hours to sketch your trellis and gather materials.
– Material Preparation: 1 hour for cutting and prepping your wood or metal.
– Assembly: 2-3 hours depending on complexity and your skill level.
Skill Requirements:
– Required skills: Basic woodworking, measuring, and assembling skills. Some projects may need a bit of creativity in design.
– Beginner-friendly: Yes. Most designs offer clear instructions and can be completed with minimal experience.
– Skills that can be learned: Measuring, cutting, and assembling. These are essential skills for any DIY project.
– Skills requiring experience: Advanced joinery or complex designs may need a bit more knowledge, but most projects can be simplified for beginners.
Tools & Materials Needed:
🧰 Essential items checklist:
– Lumber or metal pipes (required): Choose treated wood or durable metal for longevity.
– Nails or screws (required): Select sturdy fasteners to hold your trellis together.
– Saw (required): A hand saw or power saw will make cuts easier and faster.
– Drill (required): Useful for making holes for screws or stakes.
– Measuring tape (required): Ensure accurate measurements for a well-constructed trellis.
– Level (optional): Helps to ensure your trellis is straight and stable.
– Paint or sealant (optional): For added protection against weather elements.
– Garden twine or wire (optional): Useful for securing raspberry canes to the trellis.
Step-by-Step Overview:
1. Planning and Design (1-2 hours): Decide on the style of trellis you wish to build. Consider your space and the raspberry variety.
2. Material Preparation (1 hour): Gather all necessary materials and tools. Cut wood or metal to the required lengths based on your design.
3. Assembly (2-3 hours): Start assembling your trellis according to your design. Use screws or nails to secure components, ensuring stability throughout.
4. Installation (1 hour): Once assembled, secure your trellis in the desired location in your garden. Make sure it stands straight and is firmly in the ground.
5. Final Touches (optional): Paint or seal your trellis if desired. Then, tie the raspberry canes to the structure for support and growth.
Cost Comparison: Professional vs DIY:
Hiring a professional to install a trellis can cost anywhere from $200 to $600, depending on the complexity and materials. In contrast, a DIY project may run between $50 to $150, based on your chosen materials and tools. If you are looking to save money and enjoy a hands-on project, tackling this yourself is a great choice. Just remember, if you’re not comfortable with tools or building, seeking professional help might be worth the investment.
Decorative Garden Trellis
Editor’s Choice

SUNNYPARK Antique Garden Iron Trellis with Decorative Hummingbirds Detac…

Expandable Garden Trellis Plant Support Willow Lattice Fence Panel for C…

Wood Lattice Fence Panels for Outside 13.4″x78.8″ Expandable Natural Woo…
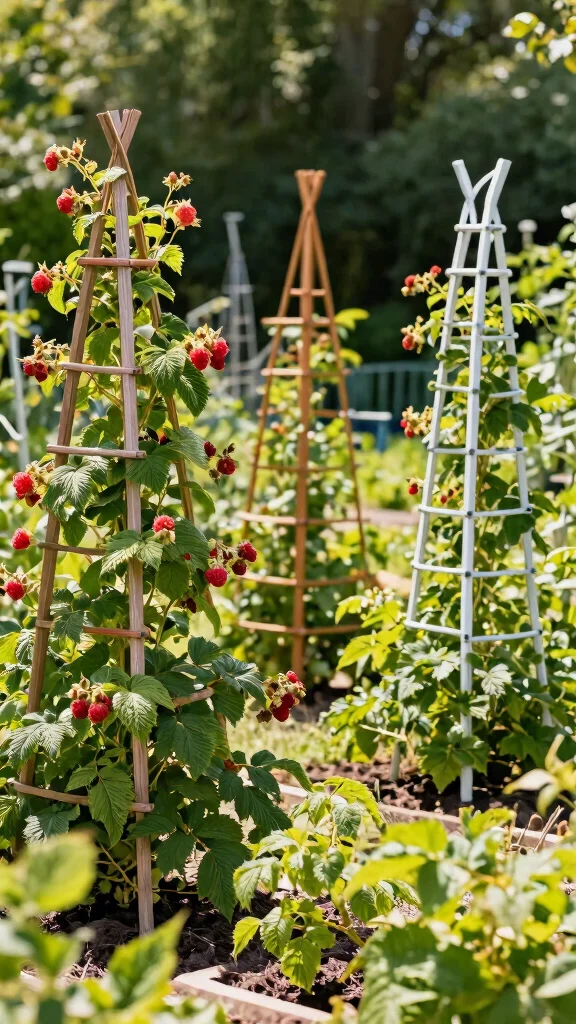
8. DIY Obelisk Trellis
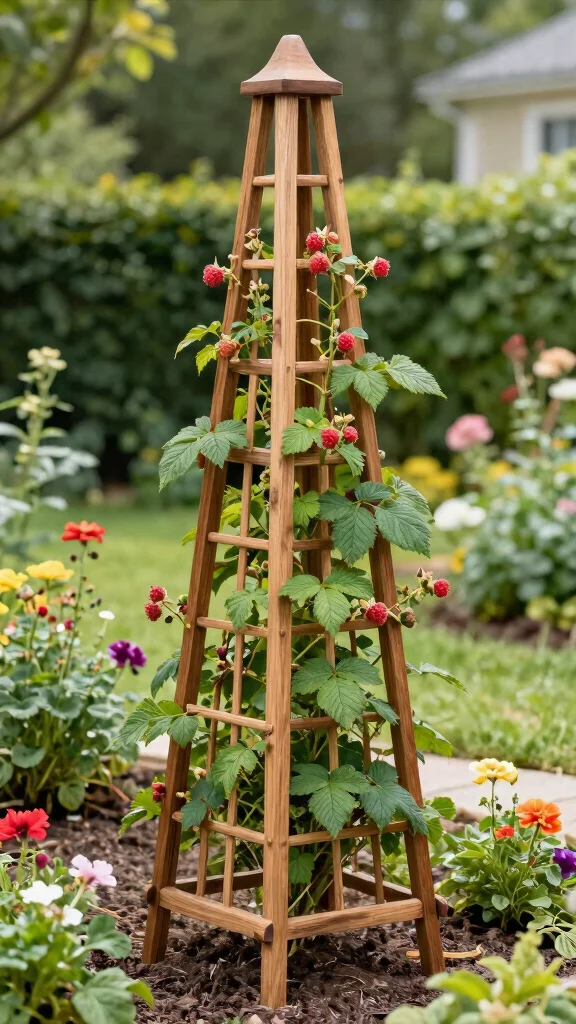
Looking for a striking vertical element in your berry garden? An obelisk trellis not only provides essential support for your raspberries but also adds a stylish touch. Its tapered design resembles a tower, enhancing your garden’s aesthetics while maximizing growing space.
To build your own obelisk, use wooden stakes or bamboo poles to create a square base. Arrange the stakes in a pyramid shape, tapering to the top. As your raspberry plants grow, train them to climb the obelisk, creating a beautiful vertical display.
Construction Tips:
– Secure the base with concrete or heavy soil to prevent tipping.
– Paint or stain the obelisk to match your garden decor.
– Add small solar lights for a magical evening glow.
This trellis combines functionality with elegance, making it a standout feature in your garden.
You Might Also Like
DIY Obelisk Trellis
Editor’s Choice

Plant Stakes,4FT Longer Sturdy Natural Bamboo Garden Stakes,GAGINANG 25P…
Vivifying Garden Twine, 656 Feet 2mm Green Plant Ties, Strong Jute Twine…
Plant Stakes,4FT Longer Sturdy Natural Bamboo Garden Stakes,GAGINANG 25P…
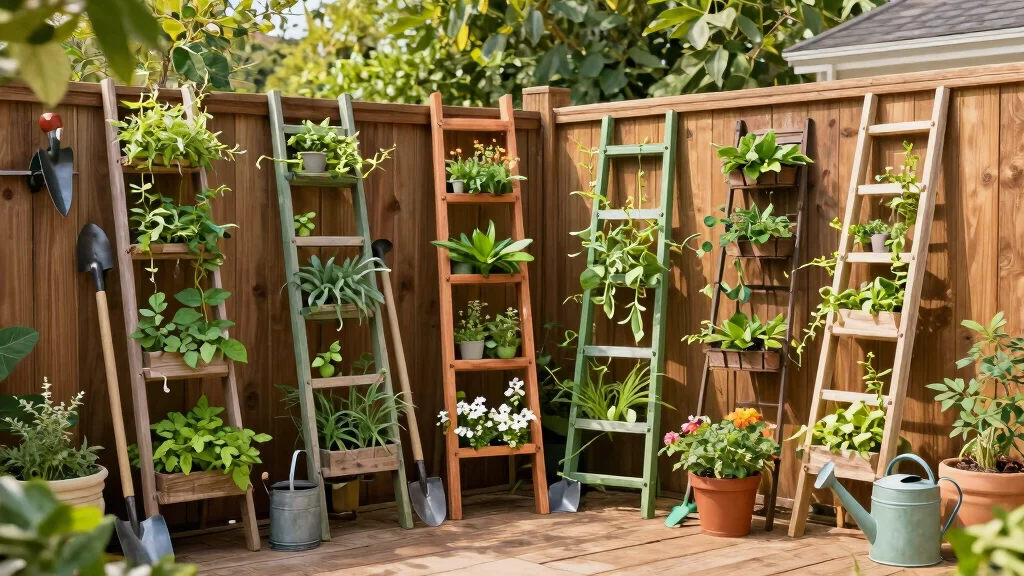
9. Leaning Ladder Trellis

Want a creative way to support your raspberry plants? A leaning ladder trellis adds an artistic touch to your garden while providing essential support. This design resembles a traditional ladder, allowing raspberries to climb along the rungs. It’s perfect for gardeners with limited space who want to grow vertically.
To create one, use long wooden planks for the sides and shorter pieces for the rungs. Construct the ladder shape and lean it against a solid structure. Use the rungs to tie or weave your raspberry canes, encouraging them to grow upward.
Creative Tips:
– Paint the ladder in bright colors for a fun accent.
– Use bottom rungs to plant herbs or flowers for a multi-layered look.
– Ensure the ladder is stable and secured to prevent toppling.
This trellis is a playful and functional addition to your berry garden.
Frustrated by tiny garden space? A leaning ladder trellis makes raspberries climb higher, saving ground and simplifying pruning. This raspberry trellis diy idea finally turns vertical space into productive, pretty rows.
Leaning Ladder Trellis
Editor’s Choice
VINGLI 85in Wooden Arbor, Wedding Arch for Ceremony, Wood Trellis for Pl…
Vivifying Garden Twine, 656 Feet 2mm Green Plant Ties, Strong Jute Twine…
10. Minimalist Pipe Trellis

If you prefer a sleek and modern design, a minimalist pipe trellis is an excellent choice. This trellis uses metal pipes to create a sturdy support structure for your raspberries. It’s ideal for contemporary gardens, combining strength with style.
To build a pipe trellis, start with metal pipes and connectors to form a rectangular or square frame. Ensure the height is sufficient for your raspberry plants. Attach horizontal pipes at different levels for climbing support. The simplicity of this design makes it easy to maintain while complementing modern aesthetics.
Building Tips:
– Powder-coated pipes add color and prevent rust.
– Regularly check connections for stability.
– This style pairs beautifully with modern planters or garden furniture.
The minimalist pipe trellis is functional and creates a striking visual impact in your berry garden.
Minimalist Pipe Trellis
Editor’s Choice

30 Pack 1/2 Inch Cast Iron Pipe Fittings (10 Elbows, 10 Tees, 10 Flange)…

Conclusion
Creating a productive berry garden can be a rewarding adventure, especially with the right trellis designs. Each of these ten raspberry trellis DIY ideas offers unique benefits, enhancing both the aesthetics and functionality of your garden. Whether you go for a classic wooden A-frame or a modern pipe trellis, the key is to choose a design that resonates with your style and needs.
Experimenting with these ideas can lead to a flourishing raspberry garden that not only provides delicious berries but also showcases your creativity. Don’t hesitate to mix and match elements to create a trellis that reflects your personality and gardening passion!
Note: We aim to provide accurate product links, but some may occasionally expire or become unavailable. If this happens, please search directly on Amazon for the product or a suitable alternative.
This post contains Amazon affiliate links, meaning we may earn a small commission if you purchase through our links, at no extra cost to you.
Frequently Asked Questions
What are the easiest raspberry trellis diy ideas for a small backyard?
For a compact setup, start with a simple single-wire trellis or a 2- to 3-wire system. A raspberry trellis diy approach can use sturdy posts, galvanized wire, and affordable hardware like eye bolts and turnbuckles. Practical steps: plan your space, choose materials (pressure-treated posts, galvanized wire, eye bolts), space posts 6-8 ft apart, install posts at the ends and every 6-8 ft, stretch 2–3 horizontal wires at about 18 in and 40 in from the ground, and secure with turnbuckles. Tie canes to the wires using soft ties or Velcro so you don’t girdle the stems. This setup is a classic vertical gardening ideas solution that keeps berries off the ground, improves air circulation, and makes harvest easier. Maintenance tips: in late winter prune vigorous canes, remove old wood, and rotate growth to the trellis. For DIY garden projects, this is quick, inexpensive, and scalable.
How do I choose a trellis design for raspberries?
Think about your space, climate, and how you’ll harvest. For most home berry gardens, a 2-wire system works well, while a 3-wire system provides extra support for trailing canes. Consider trellis construction techniques like using evenly spaced posts, proper tension on the wires, and durable fasteners to prevent sagging over time. Use spacing that matches raspberry varieties and cane growth; keep posts 6–8 ft apart with wires at roughly 18–24 inches and 40–48 inches from the ground. This is a key part of berry garden design and raspberry growing tips. For small spaces, a wall-mounted trellis or ladder-style frame is a great DIY garden projects option, and it pairs nicely with a raspberry trellis diy approach.
What are common mistakes to avoid in vertical raspberry gardening?
Avoid overcrowding, insufficient sun, and poor drainage; not securing the trellis posts leads to sagging. Common errors include using cheap, rusting hardware, too few wires for heavy canes, and not training primocanes properly. Always align with vertical gardening ideas and raspberry growing tips to keep air circulating and pests minimal. Plan for annual pruning and rotate growth to the trellis; replace worn ties and hardware as needed. A thoughtful berry garden design yields better yields and easier upkeep.
What tools and materials do I need for raspberry trellis diy?
Here’s a practical checklist: two sturdy posts (4×4 or 6×6), galvanized wire or cattle panels, eye bolts, eye nuts, turnbuckles, quick-dry concrete for footers if needed, post anchors, cable clamps, soft plant ties or Velcro, a tape measure, a level, and a drill/driver. Choose weather-proof hardware for long life and plan for raspberry trellis diy longevity with trellis construction techniques. This DIY garden projects kit fits many berry garden design scenarios and can be adapted to a small balcony or yard. Add a few spare wires for expansion as your vertical gardening ideas grow.
How can I train and prune raspberries on a trellis for best production?
Train primocanes to the wires as they grow; tie them at the top wire so they layer along the frame rather than drooping. Prune canes that have fruited in late winter to encourage new fruiting wood, and thin crowded canes to improve air flow; look for a balance of 4–6 canes per plant in the crown. Practice makes perfect in raspberry growing tips, and you’ll see bigger, sweeter berries with less disease when the plant isn’t congested. Keep the trellis sturdy and inspect ties yearly; replace any worn ties to keep plants secure. This is a practical application of vertical gardening ideas and berry garden design principles.
Related Topics
raspberry trellis diy
vertical gardening
berry garden design
DIY garden projects
beginner gardening
trellis construction
productive gardens
easy gardening tips
sustainable gardening
garden organization
seasonal gardening
home gardening techniques